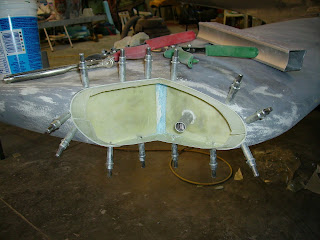
The cowling finishing is getting to the final stages. It involves going over it inch by inch with a light in one hand and the filler applicator in the other. A dab goes on each imperfection. When no more imperfections can be found, then you can call it done. Sometimes the process seems like it will never end.
I'll give it one more application after this, sand it all, then put about 4 coats of high build primer on it.
Sunday, March 28, 2010
Tuesday, March 23, 2010
Cowling Door and exit air
I'm adding a small door to close up the cowling when the landing gear is up. First I'm modifying the cowling to streamline the air exit by adding an trailing edge "turnout". More on the door later. Still making it.
Rudder Repair
Aircraft flying at night are required to have a bright white light facing aft. I am installing a strip of LED lights for the rear rudder nav lighting.
First I need to remove the old incandescent bulb mounting which was a bump on the rudder.
First I need to remove the old incandescent bulb mounting which was a bump on the rudder.
Monday, March 15, 2010
Landing gear doors
I brought the landing gear doors home today. I'll try to make them smooth in the next day. Should have some completed pictures in a couple of days.
Sunday, March 14, 2010
Cowling fit
This is a view of the bottom front area of the airplane, just behind the engine cowling. The small clamp (black and yellow) is located where the air exits the cowling. I'm repairing the size of the slot at the bottom of the cowl (allows room for the nose wheel strut when gear is down). The door you see behind the clamp is where the nose wheel landing gear lives. In flight the nose landing gear tucks in the bay covered by this door. To smooth the airflow and look of the cowling into the lower fuselage, I made little transition ramps at the air exit. I used plywood wedges to form a smooth ramp. After the filler cures, I'll remove the plywood and then touch up with fill. You'll see the finished idea in the next few days.
Matching the wing bottoms to fuselage bottom
Now the process is the match everything on the bottom to flow together. A fast airplane must have smooth transition at all of the seams (eg. cowling to fuselage, wings to fuselage, wings to flaps, ailerons, etc.)
The Long Journey
This has been a long journey to complete a Lancair Aircraft Kit. I purchased it in 2005 and have now invested about 2500 hours of labor. Unfortunately, it was not a new kit when I purchased it. Several other people had attempted to build the airplane. However, the workmanship was inconsistent and was not neat enough for my liking. It also had considerable safety concerns. So, I dismantled, cut-apart, and destoyed about 70% of the work done by the previous owner.
Friday, March 12, 2010
Wing Tip Lenses
I had this idea that I would conceal the lighting in the wing tip and make a lense to cover them. However, it turned out to be a huge job. Since I made the custom wing tip shapes, I had to mold my own acrylic lenses. Initially, I thought I could simply pull hot plexiglass over the finished wing tip. Wrong. The plexi wouldn't conform to the complex curve. Finally, I found the right person in Edmonton (Acro Foam) to vacuum form the plexi. However, he required a solid male mold to stretch the plexiglass over. Wow, what a job. Below are pictures of the various stages.
This is the "rock" male mold for both left and right wing tips.
This is the roughed out notch where the wing tip light will go.
I fiberglass the opening to seal everything off.
Trial fit the lense I cut out.
Nearly finished. I'll do a little more tweaking and cleaning it up. It's 90% done.
I still need to mount the strobe and the lights. That will be done after the airplane is painted.
I still need to mount the strobe and the lights. That will be done after the airplane is painted.
This was taken yesterday.
Subscribe to:
Comments (Atom)


